Tee Titan Quick Start Guide
In a nutshell Tee Titan is a complete software and training system to get started selling t-shirts on FB ads.
This quick start guide will taken you through all the steps you need to follow to get quickly set up and selling t-shirts on Facebook in the shortest amount of time.
NB: In order to fully understand and use this Quick Start Guide to its potential, it is important that you watch all the training videos first unless you are already familiar with TeeSpring and Facebook Ads.
There are essentially four steps to follow in the Tee Titan system, these are
Step 1: Niches - Find profitable niches, a group of people or audience who have something in common that you can advertise to on Facebook
Step 2: Tshirts - TeeSpring: Create t-shirt designs by brainstorming or tweaking other designs currently out there and launch them on TeeSpring ready for our Facebook ads.
Step 3: Traffic - Facebook: Run targeted ads. This is where we drive targeted traffic to our TeeSpring campaigns and because our ads are highly targeted these are people who are likely to buy the t-shirts we are promoting.
Step 4: Profit - Test many and expand the winners. The idea here is to launch several designs and quickly 'kill' the ones that are not doing well and focus and expand further on the ones that are making sales.
STEP 1 - Find Your Niches
A) Steal My 100 Niches - This list came with your Titan package and is a list of the hottest niches that are currently profitable with Teespring. These are proven niches that we have tested exhaustively and have generated extremely profitable sales in our campaigns. You can dive straight in and pull from these if you wish. Ideally you should have 3 - 10 niches to start with.
B) Brainstorm Niches
In addition, you can brainstorm ideas from the list of categories we provided in the training videos. To get your ideas going think of people around you, friends and family, their professions, jobs, interests, groups they belong to, hobbies and pastimes that take part in. Sports teams and clubs in your local area. The initial idea is to just brainstorm a long list of possible ideas that we can trim down later.
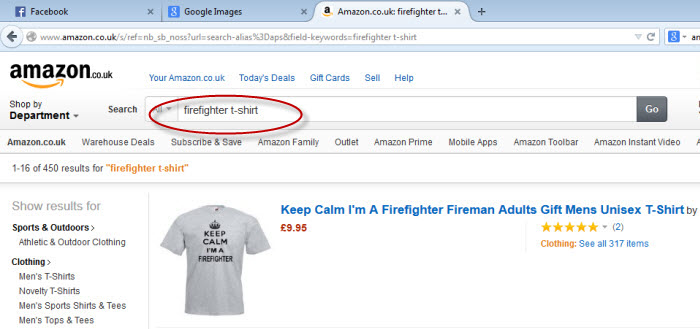
The best way to do this is to open up Facebook Ads/Google/Amazon in separate tabs so that you can dart between them quickly to research your ideas and to see if there are products out there currently being sold. Enter your chosen keyword on each site and then you can quickly check the interest number on Facebook to make sure that we have an audience for that niche ( 100k - 1million). We will cover how to check for Audience Reach later in this guide.
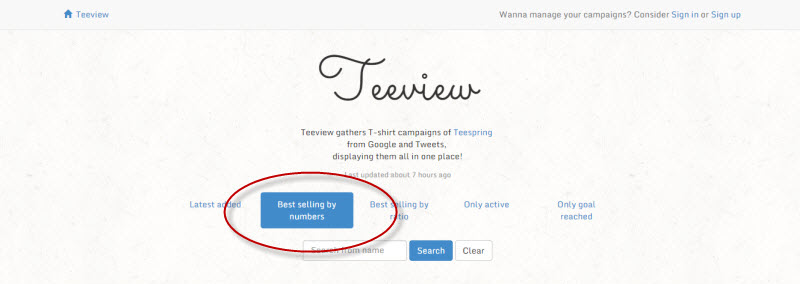
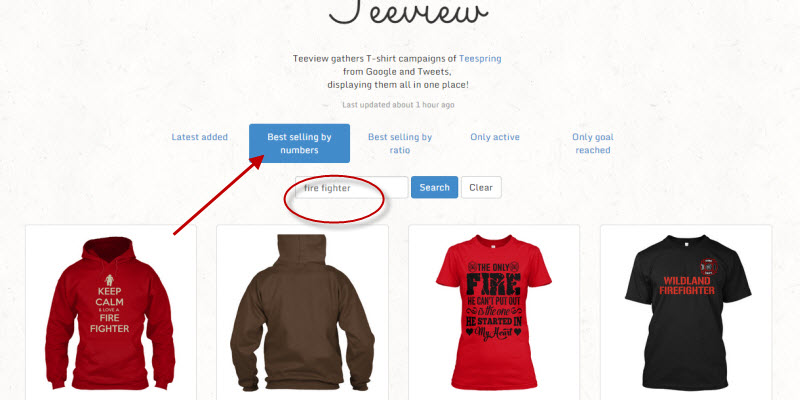
C) Look at Teeview for the best selling designs for more t-shirt ideas and to see which t-shirts are the current best-sellers.
D) Search our Tee Search software which came with your Titan package to see which of your keywords gets results.

Ideally when we search for our niche keyword we want to find t-shirts that are selling on other sites such as Amazon, ebay, red bubble etc so we know they are popular but not too many of them on TeeSpring. The reason for this is because if other teespring marketers see high numbers of shirts selling on teespring then naturally they are going to go after this niche which increases the competition so ideally we want to find the 'sweet spot' of tee shirts that we know are selling well but haven't been over exposed on teespring.
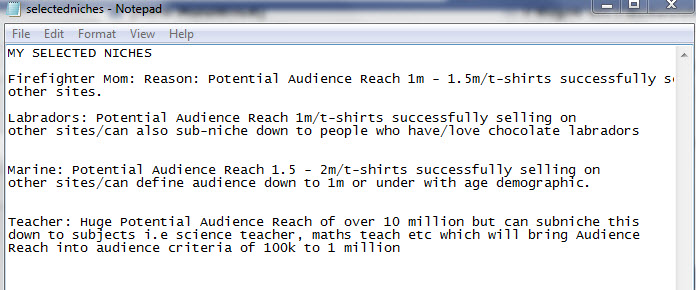
E) Pick 3 - 10 of the best niches that you are going to work with for example:
When you have completed your initial research select 3 - 10 niches that you have researched and note down your niches and reasons in a notepad file.
STEP 2 GENERATE IDEAS
At this point we should have
i) our list of niches ready
ii) our potential FB audience reach for each niche
iii) proof that t-shirts or similar products are selling in this niche
First understand what makes a good design:
- Proven metrics - it's sold, likes, appears in several places
- Fits perfectly with our targeting and Facebook Audience
- Text heavy - texts grabs attention on the FB News feed
- Easy to replicate - no clever images or graphs - one icon tops
- Black t-shirt, white text + 1x white icon (start simple or black with white and 2-4 bright colours (pink/yellow/red)
- No copyright / trademark infringement Trademarkia & Google: search any word or phrase that appears on your design
Then you can start to:
- Search for design ideas on tshirts on other sites.
- List - Write down a list of ideas/references/URLs
- Design - Make our design / hire a designer
- Put live - Upload our design to TeeSpring
- Options - Aim to have 3-5 designs ready for each new niche test
A) Search Tee Searcher
Simply enter your keyword, check the boxes for the sites you want to search and hit search to return the results. Do this for each of your keywords. The reason for this is so that you can look for potential design ideas that you can then tweak to create your own design.
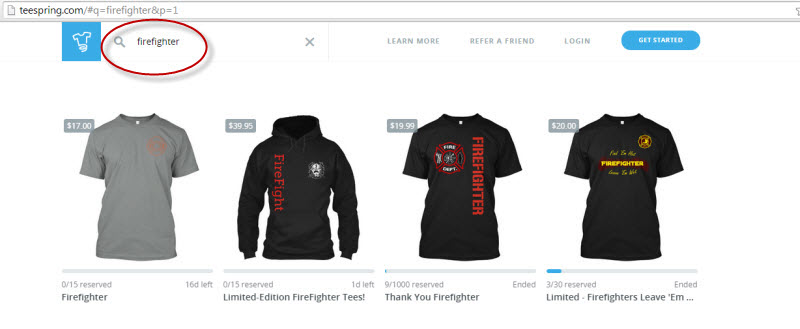
B) Search Teespring
The easiest way to this is to open teeview and teespring in two separate tabs and search with your keyword which makes it easy to jump between the two tabs.

And then you can jump between the two tabs for each of your keywords:
And...
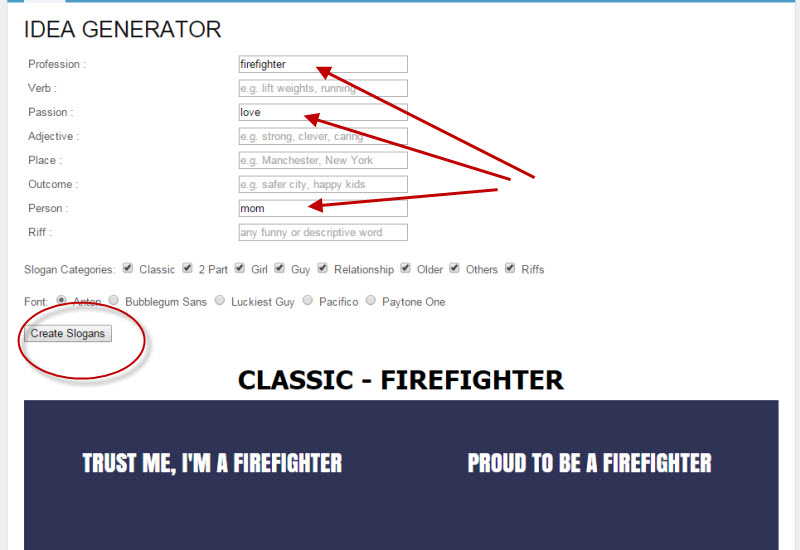
C) Search Idea Maker
Enter words for your niche and hit the 'Create Slogans' button to generate a list of slogan ideas that you can use or tweak.
You should now have a list of design ideas:

STEP 3 CREATE YOUR T-SHIRT DESIGN
You have two options here:
i) Use Tee Maker to create your design by entering your slogan and an image if you want to use one:
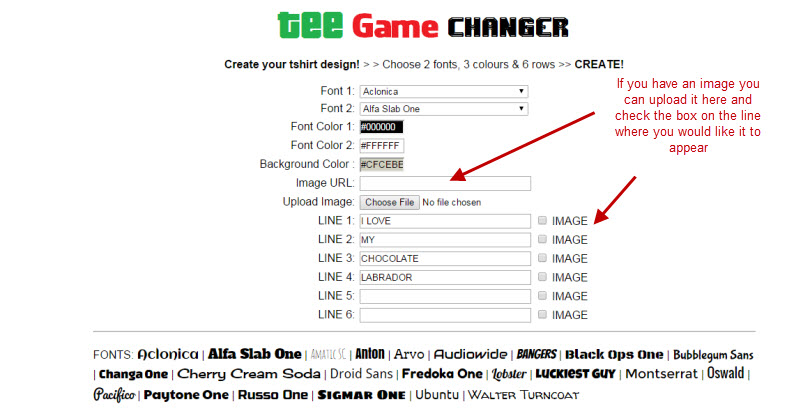
Hit the 'Create Designs' and tee maker will return 8 variations of the same design for you to choose from:

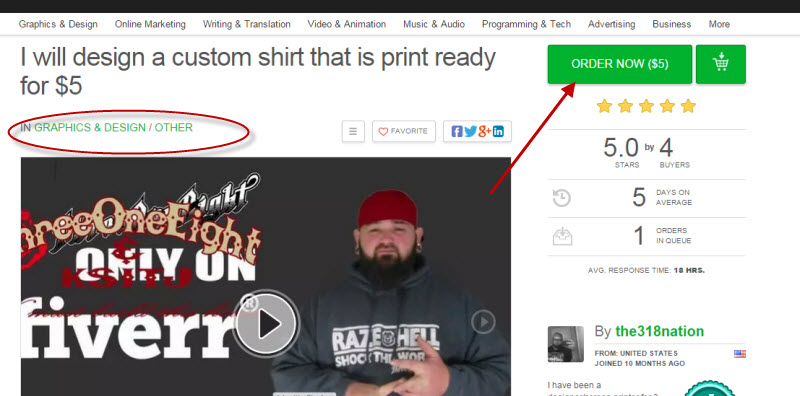
ii) Alternatively, if you don't want to create the design yourself you can use Fiverr to hire a t-shirt designer for you at a cost of $5 per design. You will need to provide a clear description of your t-shirt design when you place your order. Simply head over to Fiverr.com and sign up for a free account and place your design order from one of the many t-shirt designers listed.
STEP 4 LAUNCH YOUR TEESPRING CAMPAIGN
Now you're ready to set up your teespring campaign. It's really quick and just takes minutes to do.
A) Sign up for a free account with teespring here : www.teespring.com. Hit the Get Started button to start create your first campaign (nb: once you've created your first campaign it will ask you to complete your sign-up details so that next time you will log in first before setting up your campaigns - don't worry it's free to join Teespring).
B) Upload your t-shirt design by locating the file where you have your t-shirt design on your pc and hit the 'Add/upload art button:

C) Once you have uploaded your design it will display on the t-shirt. Remember to select the Black Hanes Tagless Tee option. Once you're happy with it hit the 'Next step' button:
D) You will then be taken to the sales goals settings page. Set your t-shirt price between $20 - $23 dollars and a sales goal of 20. Be sure that you selected 'black hanes tagless tee' above for the best return.

Again, hit the 'Next step' button to go to the next screen. Here you will need to enter a title and description for your campaign, as well as the campaign length and the url you choose for the campaign.
So, enter the title of your t-shirt, and the description in the box (we have provided the full description we suggest you use directly under this image). Set you campaign to run for 7 - 10 days and choose a url for your campaign - this is the link that people will see in your facebook ad when it goes live.
Here is the full description you can use for all your campaigns - just remember to change the end of campaign date!
Sale ends October 28th. Click Buy It Now below to order yours today. This will not be reprinted. Not Sold in Stores. Guaranteed safe and secure checkout via: PayPal / VISA / MASTERCARD Click Buy It Now to pick your size and order. |
Next scroll down the page, check the terms and conditions box and then hit the 'Launch Your Campaign' button at the bottom of the page. Your teespring is now live!
STEP 5 - LAUNCH YOUR FACEBOOK ADS
A) For each niche you need to have a potential Audience Reach of between 100k - 1 million for your campaign to be profitable. So the first step is to brainstorm keywords for your chosen niche. The easiest way to do this is by using Facebook's 'Audience Insights' which allows you to enter different demographics and interests for your niche.
Here's how we do this:
i) Click on the 'Audience Insights' link on the left side of the screen within the ads section of Facebook
:
ii) After this you will arrive on the Audience Insights page.
Here you can see the audience demographics I have entered for the firefighter niche which has given me a potential Audience Reach of 500 - 600k.
Location: United States
Age: 37 - 50
Gender: Women
Interests: firefighter
NB: Spend 15-20 minutes exploring these demographics to see how different interests, age and gender affect the potential audience for your campaign in order to get the best results.

B) How To Find Interests
There are several ways you can find interests. Either by searching your keyword on Google to find groups, communities, organisations etc and you can also use Facebook's graph search facility as well as Audience insights.
i) For example if our niche was labradors on Google we might search for :
labrador puppies
chocolate labradors
rescue labradors
labrador magazine
labrador lover
adopt a labrador
These keywords would allow us to explore further keywords and ideas for labradors.
ii) If we search with Facebook's Graph Search facility we have the ability to search for pages, products and websites liked by people, for example:
a) Pages Named KEYWORD Liked by People who Like KEYWORD
Examples:
Pages named "Nurse" liked by people who like Nurses
Pages named "Nursing" liked by people who like Nursing
b) Products / Websites named KEYWORD Liked by People who Like
KEYWORD
Example:
Products named "dog" liked by people who like Dogs
Products named "Golf Clubs" liked by people who like Golf
c) Products/Pages Like by People who Like PAGE NAME
Example:
Products liked by people who like Support My Gun Rights
iii) If we use Facebook's Audience Insights we can take our keywords and enter them into the 'Interests' box, for example:

C) Once you have you have identified the demographics and interests of your audience it's time to set up your Facebook Ad.
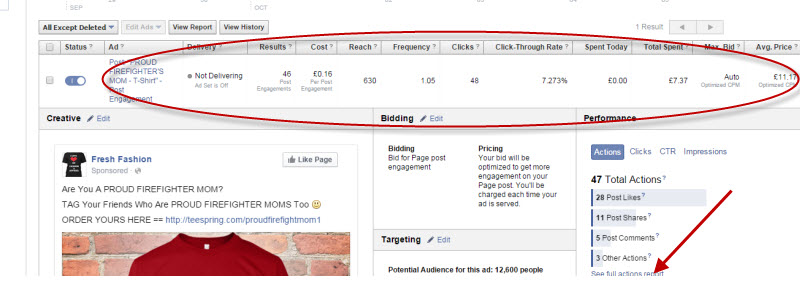
We recommend you used Post Page Engagement for your ads and for this you will need to set up a fan page within your Facebook account so that you can post your ad to your fan page.
This is a necessary step since you won't be able to launch your ad as a Page Post Engagement unless you have created a post on your fan page to send people to.
You can set up a generic fan page for all your facebook ads or you may choose to set up a fan page for each niche i.e. firefighter mom, labrador fan, baseball lover etc.
6) CREATE YOUR FACEBOOK POST
A) Select your newly created fan page link from the left side of your home page to take you to your fan page.
B) Next you need to create a post for your fan page in order to be able to set up your Facebook Ad:
Keep the post simple and straightforward. Note, you will now need the url of the teespring campaign you set up earlier as you need to include this link in your post. Below is a screen shot of suggested text you can use for your ad - just change the title and words to suit your niche:

Remember to tweak the wording to suit your niche.
Once you enter the url of your teespring campaign the image of your shirt will appear see a demo example below:

NB: You can also create an image using our Auto Model software if you prefer.
Once your post and image appears - hit the post button to make your post live.
7) CREATE YOUR FACEBOOK AD
So now that you have your post ready it's time to create your Facebook Ad.
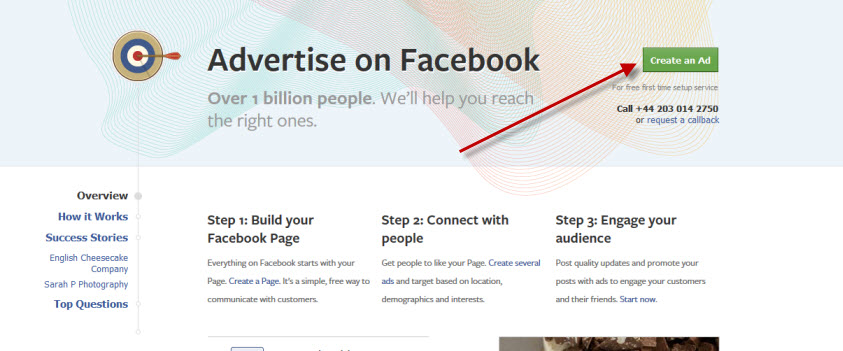
A) Click on the arrow in the top right of your Facebook homepage and then on the 'Create Ads' link.
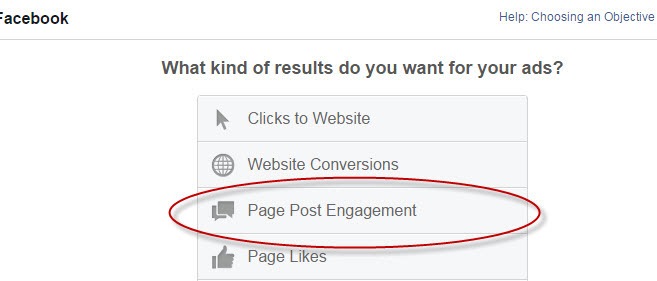
B) Select Page Post Engagement
C) Your newly created fan page will appear on the next screen. If you have more than one fan page select the one you want from the drop down menu and then click the 'Continue' button:

D) Next you will arrive on the page with your post ready to create your ad.
i) Click on the 'remove' link so that your ads will not appear on Mobile News Feed or the Right Column of Facebook pages. Conversions are generally not good from these ad spots so we only want our post to appear in the main New Feed

Once you have disabled these links it should look like this:

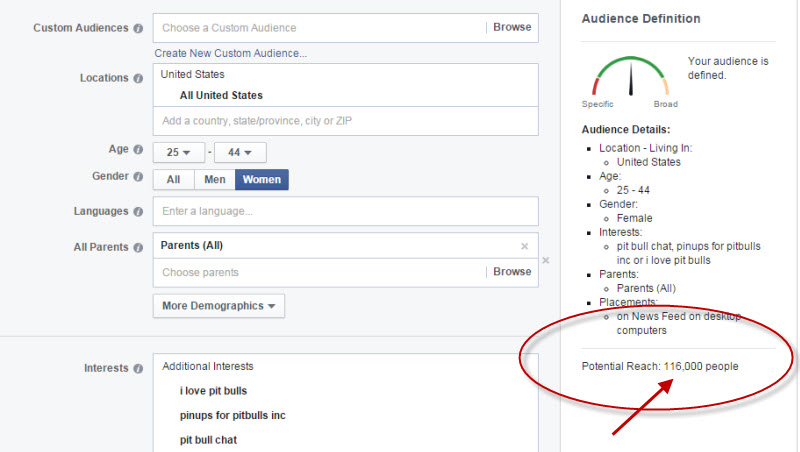
ii) Next you need to set the demographics so that Facebook knows who you want to see your idea. These are the demographics you researched in 'Audience Insights'. For example::
Location: United States
Age: 25-44
Gender: Female
Interests: I love pit bulls, pit bull chat, pinups for pit bulls inc
Selected: parents
These are entered in the screen shot below but you should enter the demographics you selected for your ad from your 'Audience Insights' research earlier.